The smell of tangyuan simmering on the stove. Strips of red paper scattered across the kitchen table. A child’s laughter as a wonky, handmade lantern finally takes shape. This is what celebrating the Lantern Festival looks like when you bring the tradition home.
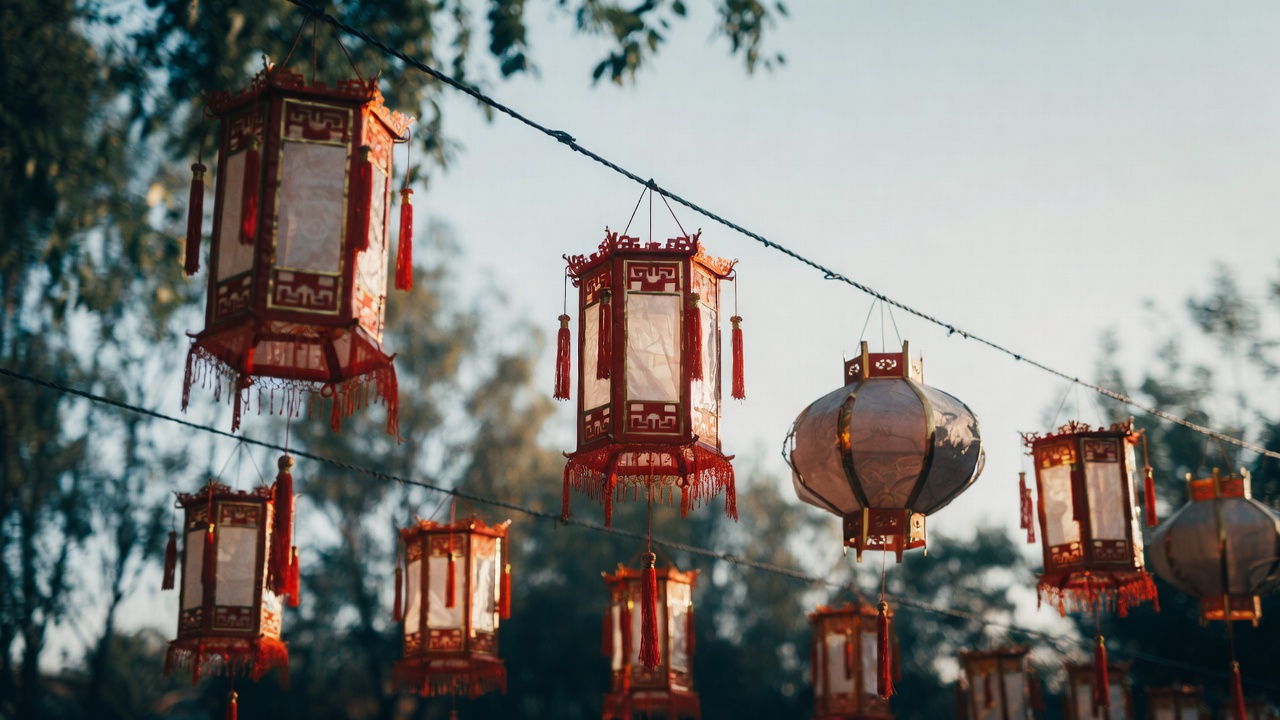
In 2026, the Year of the Fire Horse galloped in on February 17, kicking off 16 days of Spring Festival celebrations. The festivities wrap up with the Lantern Festival (Yuan Xiao Jie) on March 3, 2026 — the night of the first full moon in the new lunar year. Across China and Chinese communities worldwide, streets glow with red. Lanterns sway outside doorways. Riddles dangle from silk threads.
But you do not need to be in Beijing or Taipei to take part. Making lanterns at home is one of the oldest and most accessible ways to join this celebration, wherever you are. It is also a meaningful way to teach children about a tradition that stretches back nearly 2,000 years to the Eastern Han Dynasty (25–220 AD).
This guide walks you through five DIY Chinese lantern crafts — from a classic paper design your grandmother might recognize to upcycled projects that give old household items new life. Each one is family-friendly, budget-conscious, and rooted in the real cultural meaning behind the glow.
Why Chinese Lanterns Are an Important Symbol of the Lunar New Year
Before you pick up the scissors, it helps to understand what you are making — and why it matters.
Chinese lanterns were not always decorations. They started as practical light sources. During the Eastern Han Dynasty, people built frames from bamboo and wheat straw, stretched silk or paper over them, and placed candles inside. Monks later adopted these lanterns to honor the Buddha on the twelfth day of the first lunar month. When Emperor Hanmingdi — a devoted Buddhist — ordered citizens to follow the monks’ practice, the tradition spread from temples to households.
By the Tang Dynasty (618–907 AD), lanterns had become central to grand public festivals. Citizens lit them to celebrate peace and prosperity. Entire cities were adorned with lanterns shaped like animals, flowers, and mythical creatures. The practice grew further during the Ming and Qing Dynasties, when lantern festivals expanded into massive public spectacles featuring riddles, dragon dances, and elaborate multi-tiered displays.
Today, the Lantern Festival marks the grand finale of Spring Festival celebrations. It falls on the 15th day of the first lunar month — always between early February and early March. As China Highlights notes, the Lantern Festival was listed as a national intangible cultural heritage element in 2008, cementing its significance in modern Chinese culture.
What the Colors of Chinese Lanterns Mean
Color is never random in Chinese lantern-making. Each hue carries specific wishes and cultural weight. Choosing the right color for your DIY lantern turns a craft project into a meaningful gesture.
| Color | Symbolism | When to Use |
|---|---|---|
| Red | Joy, prosperity, good fortune | Spring Festival, weddings, birthdays |
| Gold / Yellow | Wealth, nobility, academic success | New Year, students’ study areas |
| Green | Health, growth, harmony | Wishes for renewal and vitality |
| Blue | Healing, comfort during hardship | Times of difficulty or illness |
| White | Mourning, remembrance | Memorial occasions only — avoid for celebrations |
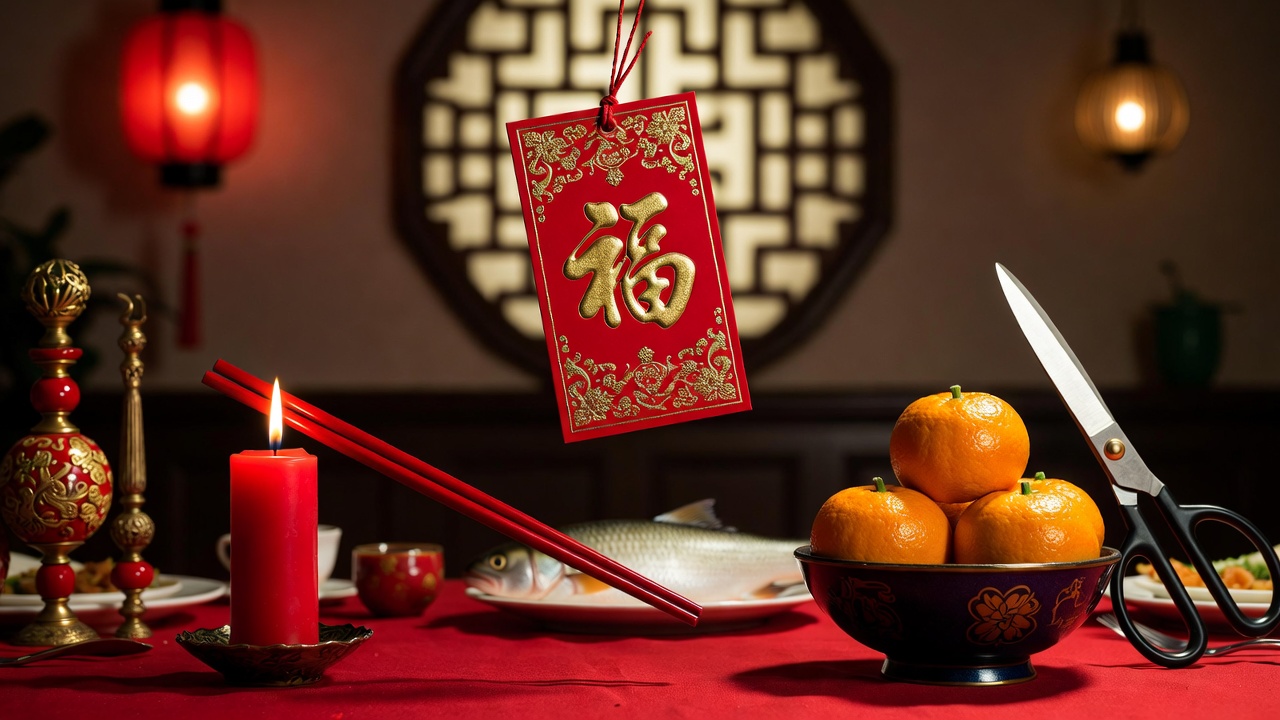
A note of cultural respect: White lanterns are traditionally reserved for funerals and remembrance. Using them for festive decoration can cause discomfort in Chinese communities. When in doubt, stick with red and gold — you cannot go wrong with these for any joyful occasion.
How to Make a Classic Red Paper Lantern Step by Step
This is the craft that started it all. The classic paper lantern is the one most people picture when they think of Lunar New Year decorations. It is also the simplest to make — perfect for beginners, classrooms, and young children just learning to use scissors.
Materials You Will Need
- 1 sheet of red construction paper or cardstock (8.5 × 11 inches)
- 1 sheet of gold or yellow paper for accent strips
- Scissors
- Ruler and pencil
- Glue stick or tape
- Optional: battery-operated tea light candle
Instructions
Step 1: Fold the red paper in half lengthwise (the “hot dog” fold). The folded edge should face you.
Step 2: Using a ruler, draw a pencil line about ¾ inch (2 cm) from the open edge on the unfolded side. This line is your cutting boundary — it keeps the lantern from falling apart.
Step 3: Starting from the folded edge, cut straight lines up to the pencil boundary. Space them about ½ inch (1.3 cm) apart. Cut through both layers of paper.
Step 4: Unfold the paper. Gently curl it into a cylinder shape so the two short edges meet. Glue or tape them together with about a ½-inch overlap.
Step 5: Cut a thin strip of gold paper (about 1 × 10 inches) and attach it to the top of the lantern as a handle. Add a second gold strip around the top or bottom edge for extra decoration.
Step 6 (Optional): Place a small LED tea light inside the lantern. It will glow softly through the slits. Never use a real candle — paper lanterns are flammable.
Tip for younger kids: Skip the ruler and measurement marks. Let them cut freehand strips of varying widths. The lanterns will look charmingly imperfect — and that is perfectly fine.
Upcycled Toilet Paper Roll Lantern Craft for Kids
If you want a sturdier lantern that stands upright on its own, the toilet paper roll lantern is your answer. This is an excellent project for Earth Day tie-ins, classroom activities, or families who like to reuse household materials.
The empty cardboard tube gives the lantern a solid core. The surrounding paper creates the decorative outer shell. The result is a three-dimensional lantern that looks more polished than the flat paper version — with minimal extra effort.
What You Need
- 1 empty toilet paper roll (or cut a paper towel roll in half)
- Red or gold acrylic paint (or cover with colored paper)
- 1 sheet of red or patterned construction paper (roughly 6.5 × 5.5 inches)
- Gold washi tape, sequins, or glitter glue for decorating
- Scissors, ruler, pencil, glue
- String or ribbon for hanging
How to Build It
Step 1: Paint the toilet paper roll yellow or gold. Let it dry fully. This becomes the glowing “core” of the lantern.
Step 2: Cut a rectangle of red paper approximately 16 cm × 14 cm. Also cut a small strip about 12 cm × 1.5 cm for the handle.
Step 3: Fold the rectangle in half along the longer axis. On the folded side, draw cutting lines every 1 cm, stopping about 1.5 cm before the open edge.
Step 4: Cut along every line through both layers. Unfold the paper and reverse the fold so the pencil marks are hidden inside.
Step 5: Wrap the cut paper around the painted toilet roll. Glue it at the top and bottom edges so the slitted paper bows outward, forming the lantern shape.
Step 6: Glue the small strip to the inside of the roll as a handle. Decorate with gold sequins, washi tape, or stickers.
Why kids love this craft: The toilet paper roll gives the lantern a surprising 3D pop. When you push the slitted paper outward, it creates a round belly that looks just like a real hanging lantern. String several together on a ribbon for a stunning garland.
Red Envelope Lantern: How to Reuse Lucky Hongbao for Crafts
Here is a craft that solves two problems at once. After Lunar New Year, families often have stacks of emptied red envelopes (hongbao / 红包) lying around. These glossy, gold-stamped packets are too beautiful to throw away — but what do you do with them?
Turn them into lanterns.
This clever upcycled craft has been popular across East and Southeast Asia for years. It transforms used red envelopes into geometric, globe-shaped lanterns that look surprisingly elegant. The project requires no cutting of the envelopes themselves — only folding and stapling.
Materials
- 12 red envelopes of the same size (standard rectangular hongbao)
- Stapler
- Red string or tassel for hanging
- Optional: a gold bead for the top
Assembly Steps
Step 1: Take one red envelope. Fold it in half widthwise so the short edges meet. Crease firmly. Repeat with all 12 envelopes.
Step 2: Stack 4 folded envelopes together, aligning the folded edges. Staple them together at the center of the folded edge.
Step 3: Repeat Step 2 with the remaining envelopes, creating 3 sets of 4.
Step 4: Fan each set open like a book. Then join the three sets together by stapling the outer flaps of adjacent sets to each other. When all connections are made, the envelopes form a round, globe-like shape.
Step 5: Thread a red string through the top. Add a gold bead or tassel at the bottom. Hang it up and admire.
Cultural context: The hongbao tradition goes back centuries. Red envelopes filled with money are given during Lunar New Year, weddings, and birthdays as wishes for good fortune. Repurposing them into lanterns extends the blessing — the luck does not get thrown away. It gets transformed.
Chinese Lantern Fairy Light Garland for Festive Home Decor
This craft takes the humble paper lantern and turns it into something magical. By making miniature lanterns and threading them onto a strand of fairy lights, you create a warm, glowing garland that works as both a Lunar New Year decoration and year-round home accent.
The idea is simple: make tiny versions of the classic paper lantern and attach each one over a single bulb on a string of LED fairy lights. The paper catches the light and creates a soft, warm red-and-gold glow across any room.
Supplies
- 1 strand of LED fairy lights (battery-operated or plug-in; warm white works best)
- Red and gold paper or lightweight cardstock
- Scissors
- Double-sided tape or a glue stick
- Optional: gold metallic pen for adding characters or designs
Step-by-Step Guide
Step 1: Cut a single sheet of red A4 paper into 8 equal pieces by folding it in half three times, then cutting along the creases. Each small rectangle becomes one mini lantern.
Step 2: Take one small rectangle. Fold it in half lengthwise. Cut slits from the folded edge, stopping about ½ cm from the open edge. Space them roughly ½ cm apart.
Step 3: Unfold the paper. Roll it into a tiny cylinder and secure with double-sided tape. Gently push the top and bottom toward each other so the paper bows outward.
Step 4: Slip the mini lantern over one bulb on the fairy light strand. Use a small piece of tape to hold it in place if needed.
Step 5: Repeat until you have lanterns on every other bulb — or every bulb, if you prefer a denser look. Alternate red and gold for a more dynamic effect.
Step 6 (Optional): Use a gold metallic pen to write 福 (fú, meaning “good fortune”) on a few lanterns before assembling them. This adds an authentic, personal touch.
Display ideas: Drape the garland across a mantelpiece, along a bookshelf, around a window frame, or over a dining table. The warm glow creates a cozy atmosphere that captures the spirit of the Lantern Festival — without the fire hazard of real candles.
Origami Paper Lantern With Tassel Decoration for Adults
Not every lantern craft has to be kid-friendly. This origami-style lantern with a handmade tassel is a more refined project that works beautifully as home decor, a dinner party centerpiece, or a thoughtful handmade gift.
The lantern body uses a disc-and-cardstock technique that creates a round, sculptural shape. The tassel adds elegance and movement. Together, they produce a decorative piece that looks store-bought — but carries the personal warmth of something handmade.
Materials
- Patterned paper (origami paper, old book pages, maps, or wrapping paper)
- Card stock for the structural body
- Circle paper punch (about 1.5-inch diameter) or scissors and a traced template
- Double-sided tape
- Thin string or embroidery thread
- Lightweight paper for the tassel (tissue paper or origami paper)
- Optional: a small paper bead or wooden bead
How to Craft It
Step 1 — Make the body: Cut a strip of cardstock approximately 2.5 × 7 inches (6 × 18 cm). Apply double-sided tape along one long edge. Roll it into a cylinder and press to seal.
Step 2 — Add the disc layer: Using your punch or scissors, cut about 20 circular discs from your patterned paper. Fold each disc in half. Glue the flat side of each folded disc around the outside of the cylinder, overlapping them slightly like fish scales. Cover the entire surface.
Step 3 — Make the tassel: Cut a strip of lightweight paper about 2.5 × 6 inches (6 × 15 cm). Apply a thin strip of tape across one long edge. Fringe the rest of the paper by cutting thin slits from the bottom up to the tape line. Roll the fringed paper tightly and secure with tape to form the tassel.
Step 4 — Make a paper bead: Cut a long, thin triangle of paper (about 8 inches long, ½ inch wide at the base). Wrap it tightly around a toothpick or skewer, starting from the wide end. Glue the tip. Slide the bead off.
Step 5 — Assemble: Thread a needle with string. Pass it down through the top of the lantern cylinder, through the paper bead, and through the center of the tassel. Knot it at the bottom. Leave a loop at the top for hanging.
What makes this craft special: The beauty of this design is its versatility. Use vintage map pages for a travel-themed dinner party. Use red-and-gold origami paper for Lunar New Year. Use old book pages for a literary gathering. The same technique adapts to any occasion.
Best Materials and Safety Tips for Making Chinese Lanterns at Home
No matter which craft you choose, a few practical considerations can make the process smoother, safer, and more enjoyable.
Choosing the Right Paper
The type of paper affects how your lantern looks and holds its shape.
| Paper Type | Best For | Notes |
|---|---|---|
| Construction paper | Classic lanterns, kids’ crafts | Affordable, easy to cut, many colors |
| Cardstock | Toilet roll lanterns, adult crafts | Holds shape well, slightly harder to cut |
| Origami paper | Disc lanterns, decorative projects | Lightweight, beautiful patterns, folds crisply |
| Tissue paper | Tassels, layered decoration | Very fragile — handle gently |
| Red envelopes (hongbao) | Envelope lanterns | Pre-decorated, glossy finish, free after Lunar New Year |
Fire Safety Rules
This is non-negotiable. Never place a real candle inside a paper lantern. Paper is flammable. One unattended flame can cause a serious fire.
Use battery-operated LED tea lights or fairy lights instead. They produce a warm, realistic glow without any heat or flame. Modern LED candles are inexpensive and widely available at dollar stores, craft shops, and online retailers.
If you want to release a sky lantern outdoors, check your local fire regulations first. Many cities and counties in the United States, United Kingdom, and Australia have banned sky lantern releases due to wildfire risk and environmental concerns. When in doubt, keep the celebration indoors with LED-lit lanterns.
Age-Appropriate Adjustments
- Ages 3–5: Pre-cut the paper. Let children decorate with stickers, stamps, and crayons. Skip scissors entirely.
- Ages 6–9: Children can cut straight lines with supervision. The classic paper lantern and toilet roll lantern are ideal.
- Ages 10+: Older children can handle the red envelope lantern and fairy light garland independently.
- Adults: The origami disc lantern with tassel offers the most creative challenge and elegant result.
How to Display DIY Chinese Lanterns for Lunar New Year at Home
You have made the lanterns. Now what?
Placement matters. In Chinese tradition, lanterns are not just tossed on a shelf. They are displayed with intention — to welcome good fortune, ward off negativity, and signal celebration to neighbors and visitors.
Here are some display ideas that respect the tradition while fitting a modern home:
At the front door. Hang a pair of red lanterns at the entrance. In Chinese culture, lanterns are traditionally hung in pairs to balance yin and yang energy. This signals a warm welcome and invites good luck into the home.
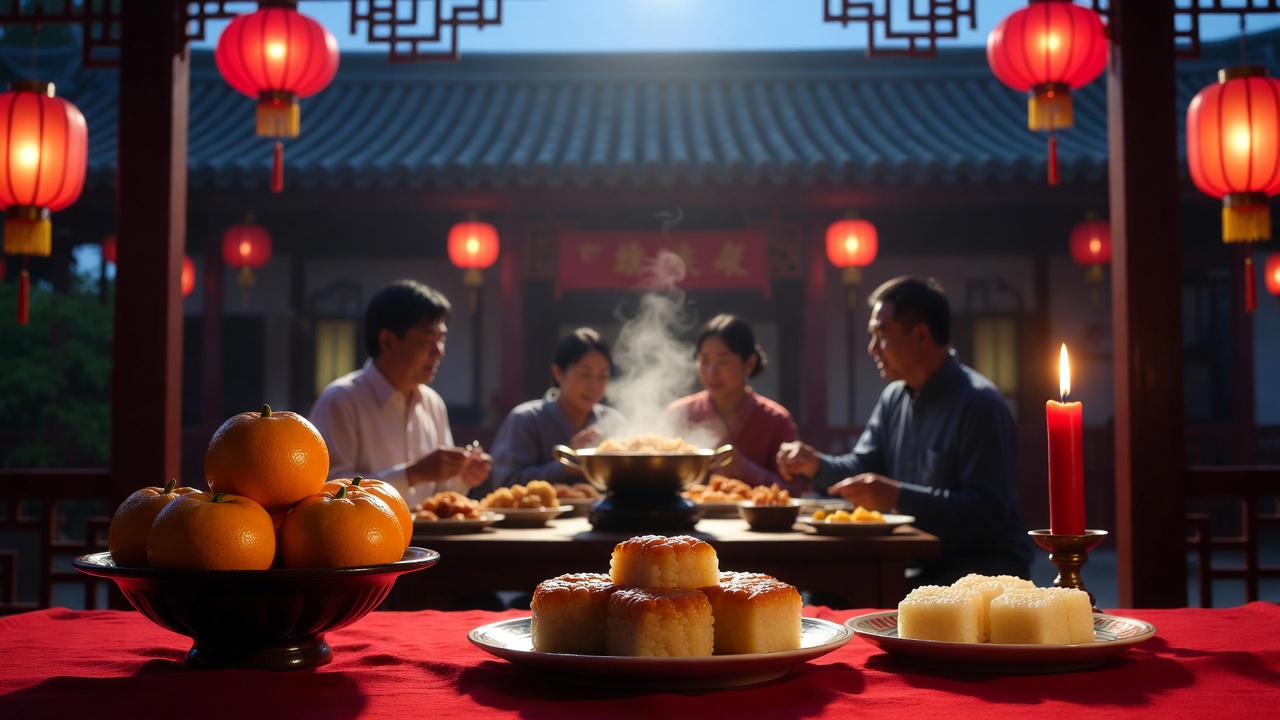
Over the dining table. Group 3–5 lanterns of different sizes above the table where your family shares meals. This echoes the Lantern Festival custom of gathering around food — especially tangyuan (sweet rice balls), whose round shape symbolizes family unity.
As a window display. Line a windowsill with glowing LED-lit lanterns so passersby can see the celebration from outside. This echoes how shopkeepers and households in China line their windows and storefronts with lanterns during the Spring Festival.
On a garland. String the fairy light lanterns or red envelope lanterns across a mantelpiece, bookshelf, or children’s bedroom. This creates a festive atmosphere that lasts all 16 days of celebration.
As a centerpiece. Place the origami disc lantern at the center of a Lunar New Year dinner table, flanked by tangerines (symbols of wealth) and a small dish of candy (symbols of sweetness in the year ahead).
Celebrating the Year of the Fire Horse 2026 With Handmade Lanterns
The Year of the Fire Horse arrives once every 60 years. The last one was in 1966. In Chinese astrology, the Horse symbolizes energy, confidence, and forward motion. The Fire element turns that energy up further — bold, determined, and action-oriented.
Making lanterns by hand fits the spirit of this year perfectly. It is an active, creative, hands-on way to engage with one of the world’s oldest living cultural traditions. You are not just watching a festival from afar. You are participating in it — folding, cutting, gluing, and lighting up your own corner of the world.
Whether you are celebrating with family, hosting a Lunar New Year dinner for friends, or teaching your children about the traditions of Chinese culture, these five crafts give you a tangible way to connect with the meaning behind the glow.
The lantern, at its core, has always been about the same thing: light pushing back darkness, and the hope that brightness brings.
Happy Lantern Festival. 元宵节快乐! (Yuánxiāojié kuàilè!)
Enjoyed this guide? Share it with friends who love hands-on celebrations and cultural crafts. Pin your favorite lantern design for next year’s festivities.